 |
| This is titillating stuff, I tell ya. |
My family hasn't sent me away yet, so I think that means I can make a couple more pillows. Wouldn't you agree? Don't answer that. Just indulge me. Then commit me.
While cruising around Target's website for something (I can't even remember what exactly, probably more pillows), I came across these napkins with my favorite shape on them.
 |
| Via here. $10 for four. Qua-trefoil is my favorite shape, in case you didn't get that. |
Target isn't selling the napkins on the website right now. I swear I bought them a little over a week ago. You could check your local Target for availability, although mine has lied before. Well, the tutorial works for any type of fabric napkin so you could find another pattern. If you really like the pattern though, may I suggest the tablecloth?
Anyway, the napkins are also in a nice bright yellow, which is my new thing apparently. I thought this fun, bright pattern would make a great addition to our living room. So, into my cart they went. Along with the matching runner and some other fun stuff, such as a pretty gray runner. I sure know how to live it up.
I used the same basic tutorial from Budget Wise Home (see it here!) that I've used on countless other pillows, with just a few tweaks to fit my budget/needs. You see, the tutorial on Budget Wise requires one panel of fabric to be 19x19 and two panels to be 14x19. Your average fabric napkin is about 20ish x19ish. I wanted to make two pillows but I didn't want to buy another set of napkins. I was trying to keep my cost per pillow cover at $5 because I'm a cheapo. Spoiler alert: It's still totally doable.
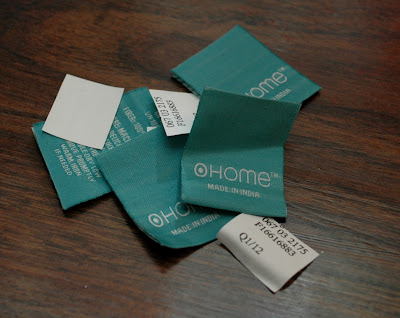
First things first, remove the tags from your napkins. You don't wan't the lovely blue of the tags peeking through the fabric and messing your whole these-totally-aren't-napkins vibe you want to acheive.
Then, iron your napkins so you won't have any funky creases and your measurements will be more exact. Next up, measure your napkin to find the longer side. Cut the longer side in half. In my case, the longer side was right about 20 inches so I cut one napkin into two 10x19 inch panels.
Next, take a second napkin, find the longer side, and mark it at 19 inches. This is where you want your two pillow sides to meet. I had about an inch of extra napkin fabric that I just cut off, so I wouldn't mistakenly attach one of my 10inch panels to the edge and have a big gap in the middle.
Take your whole napkin and lay it pattern side up on your ironing board. Your going to make you pillow inside out so you don't have to worry about pesky seams. Place one of your cut napkin pieces pattern side down on top of your whole napkin, like the picture above.
Tip for you, position your half napkin so that the finished edge is towards the middle. Normally, you would hem all sides of your fabric when making a no sew pillow but, with napkins, you don't have enough length for that. You need every inch you can get. By putting the finished edges in the middle, you don't have unsightly edges!
Using thin, heavy duty hem tape, iron your pieces together. Take your other piece of cut napkin and repeat the process on the other side. You should have a little overlap between the cut pieces.
Be sure to flip your new pillow cover over and iron the other side as well. This ensures that the hem tape will adhere completely to your fabric so it will be nice and durable. Once it's all cool, turn your cover right side out. Bingo, you have a pillow cover!
I will give you the heads up that, sometimes, the back gapes open. It isn't a big deal to me because the pillows face forward and look fine. Fantastic even. If it becomes an issue for me, I will either attach some velcro strips to the inside of the opening (so I can still switch them out) or maybe I'll even get crazy and sew a button on there. Did I mention I'm a wild woman? Button sewing! So crazy! I'll let you know what happens.
I put my new
Ok, so all of those caps lock letters would beg to differ. Time to distract you, look pillows!
I think they look rather happy on the couch! Husband gave them his approval when he said they were actually quite comfortable and soft. He supports my habits. I'm a lucky addict, I mean gal.


No comments