3.) Coming in third place is an oldie but goodie, my pantry organization post. It was featured in a post by Jen at iheartorganizing. Love that blogger! She is awesomesauce and I would totally be BFF with her, even without her sweet comments about my post. And if that wasn’t the most stalkerish comment ever. She would probably fear for her safety if she read that.
 |
| Original post here. |
2.) The numero dos spot goes to my first paint chip art attempt. This particular project went through a few phases before I settled on the final draft. Proof that you can always tweak a project until you love it. Sadly, this piece is sitting in a closet right now because it has not found a new home in our office since I got my new desk and Husband took over my old desk. Don’t feel bad for it though. The art around our house is being revamped as we speak and it may find a wall to call home yet.
 |
| Original post here. |
1.) The (coveted) first place for most popular post here on Zodirowe goes to ….drum roll….. another paint chip art! This time, I took on a Pinterest Challenge hosted by some lovely bloggers and did a different paint chip art project.
 |
| Original post here. |
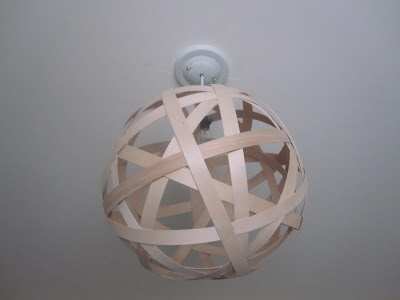
My favorite transformation so far has been our office. I love my new desk, chair, light feature, and the fact that it has become a space where Husband and I can work together. It has been wonderful to have an organized space where supplies are easy to find. I find myself spending more time in there and getting work done, Christmas aside of course.
Now that I’ve looked back, let’s look forward. Here’s where I make grand resolutions and struggle to keep them all year. That’s the way you’re supposed to do it, right? Well, I want to break tradition and keep things simple. My biggest goal for next year is to sell our condo and buy a house. O wait, I like lists. Let’s do this in list form!
- Sell condo
- Buy house
Seems simple enough. Except that a lot goes into accomplishing those goals. Here’s how the list REALLY looks:
- Fix molding in condo (True used some molding in parts of the house as his own personal scratching post. Not cool.)
- Repaint dining room (Making it more universally appealing to buyers and going with a neutral color instead of the red.)
- Repaint kitchen cabinets.
- “Stage” the condo. (Meaning make it look modern, clean, depersonalized and spacious looking for interested buyers.)
- Tackle any other little updates/fixes that might help us SELL!SELL!SELL!
- Get another appraisal and probably inspection.
- Put in on the market!
- Pray. A lot. To whomever we need to.
- If all goes well, sell the damn place.
- Find a new home. (Oy. We’ll try to keep it fun but it might get really stressful.)
- If all goes well with buying a home, move!
- While all of this is happening, save money like squirrels save nuts. (Heh. Nuts.)
Ok that may not be so simple. Our goal is to put our condo on the market by March-ish, so many of our projects at the start of the New Year will revolve around those first couple of resolutions. Early March shall already be dubbed “The Month of Tons of Painting” since we have to wait until the weather warms up to paint. Because, you know, doors and windows must be opened for ventilation lest we all die from the fumes. Certainly don’t want to die from the icy death know as winter if we paint any sooner in the year. No icy death at Casa de Zodirowe, thankyouverymuch.
I do have my own personal goals. They are the usual:
- Get healthy/Workout regularly
- Become a punctual person (Toughie for me.)
- Continue to organize my home and life.
- Get Ty in shape.
- Take better blog photos.
That dog needs to slim down for the sake of his little daschund back. True can stay fat because he’s a cat. Cats are meant to be fat.
So, that’s the plan for 2012. Looking back at 2011 again, I think my biggest accomplishment has been starting this blog! I considered starting one for several months before finally taking the plunge. I knew I wanted to blog about home décor and organizing. I remember agonizing over the name. I spent weeks trying to come up with something I liked but wasn’t already taken. That was hard, yo. I had actually written a couple of posts before I had a name picked out. Who knew that would be the toughest part for me! My poor Husband and friends had to listen to me try our different blog titles constantly.
Husband was extremely supportive at the start of this blog and has continued to be that way. Message to Husband: Thank you for being so wonderful! Whether by helping me hang a canopy for our patio, encouraging me not to give up, making useful suggestions, or just by reading my blog, I really appreciate all you do!
My mom has also been supportive of my blog and reads it regularly. Everyone say hi to Mom! Thanks Mom!
Here comes the corny part, thanks to everyone who has read and commented on my little blog! It always makes my day to see that I have new comments and followers. I get giddy every time it happens! It is so amazing to be a part of the blogging community. There are some really great people out there who are extremely encouraging and helpful. I can’t truly express how grateful I am to everyone who has helped me out as a newbie or featured one of my posts. You’re all fabulousness! Thank you thank you thank you!!


